Thursday, July 19, 2012

A DIY Fashionable Moment

I think I love fashion just as much as I love house decorating and organizing!  If you saw my closet post- you know I have a sweet spot for jewelry.  It doesn't have to be expensive- which is why I LOVE these new bracelets that I made.  I think they are not only easy to make but very stylish.  I love the look of stacked dainty bracelets.  Here is a little how to moment...

First start with your supplies of embroidery yarn and center charms.  You can find these at any craft store.

I found a few really cute charms at the website: www.baublesandbeads.com 

Start by cutting two 20in strips of the yarn.  Fold in half and pull the loop of the yarn through the ring, fold it over the ring, and pull the rest of the cord through the loop. Repeat the step on the other side of the ring. These strands will be anchored and remain stationary.

Clip one end to a note pad or clipboard to help keep the base stable.

Center another strand of the yarn cut to about 30 in. under the two middle strands. Fold the left cord over the middle strands and under the right cord. Pull the right cord under the left and middle strands and through the loop on the left side.


Pull tightly to start the top.


Continue this on each side, fold the right cord over the middle strands and under the left cord. Pull the left cord under the right and middle strands and through the loop on the right side.  Repeat this back and forth until you have the length of half your bracelet.  Then clip the other side and repeat.


Here is a completed bracelet ready for the finishing touches.

Tie on the closing clamp of your choice.


Here are a few I made within an hour tv show!


There you have it- dainty, stackable bracelets!  

Thursday, July 12, 2012

Easy Art


I love finding a way to create easy and interesting art for the home.  This fun idea is something I saw for sale on esty.com and thought... I can make that!  So I tried it out today and I am hooked.  I want to create one for every room in my house!  Here is a step by step so you too can try it out.

Start with old dictionaries found at your local Goodwill.

Create your image on your computer and do a practice print for size and a location check.

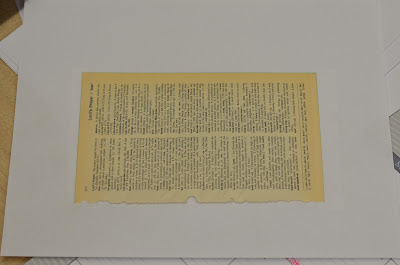
Then tear out a  page of the dictionary and tape it to the computer paper.

Then simply reprint the image onto the page that has the dictionary page taped on it.  You can even hand select the dictionary page you use based on the words found on that page.  I used the dictionary page with the word 'love' on it for my husband and my initials.  Can you eye spy 'love' on the page?.... hint: look in the M.

Then simply cut to the size of your selected frame.

Here is the finished project located on a dresser in our master bedroom.

The same can be done with a large dictionary page.

Select images you want and do a practice print.

Reprint onto the dictionary page.


I framed this page with sea shells for my dining room buffet table- it sits among a collection of items including a piece of drift wood.

Note: When searching for images I used a simple google search.  I would suggest adding the word drawing to your item search.  For example to find the boat I Google Image searched: drawings of boats.  If you add in the word drawings it brings you more artistic pictures rather than literal images.


Then I got excited about all the images that could be put onto a dictionary page for different rooms in someone's home.  I love the look of the boat or old ferris wheel for a child's room; you could do fruit or other spices for the kitchen.  The ideas are endless!  What image would you put onto dictionary paper?

Friday, July 6, 2012

Bucket List Moment


I was so excited to check something off my summer bucket list.  We made it to the IMA movie in the park with our great friends, Kevin and Kelsey!  We had the best time watching Big.  This was a great moment turned memory for the summer of 2012!


Can't wait to continue my summer bucket list fun!!

A Healthy Organization

Summer is a great time to get HEALTHY- well anytime is a good time!  I have always eaten rather healthy, and I am a big believer in you will eat what you buy.  Therefore, I only buy healthy options to keep in the house!  As I was wanting to eat healthy this summer, I wanted to clean out my refrigerator and give it a healthy/organized make over.  I started with keeping it clean and organized.  I found a great website called refrigerator coasters.  They have created a coaster that fits into the side panels and the drawers- bonus... they have cute patterns and colors.  Needless to say I order them right away.  When they came in the mail I loved them except for one tiny detail.  They felt like a coaster- the hard cardboard type.  Bummer! I really wanted something a bit more durable and wipeable.  So I took them and got each one laminated.  Now I can take them out and wipe them down to keep them clean.  I have found it much easier to clean them compared to cleaning my drawers.

I selected yellow for the side panels and grey for the drawers.


While organizing the side panels of the refrigerator, check the expiration dates on all the dressing, condiments, and other items stored there.


Finally, after your refrigerator is clean and organized take a close look at the foods you are putting back inside.  I am keeping my mantra of... if you cut and clean it, you will eat it! So often I buy fruits and veggies and they sit in their store containers and go bad.  However, if I get home from the store and immediately clean, cut, and restore these items I and my husband reach for these healthy snacks more!  These little cute coasters inspired me to clean my refrigerator and get healthy all at the same time!!  Hope you are inspired as well!
Related Posts Plugin for WordPress, Blogger...